Table of Contents
Spring is here, and it’s the perfect time to refresh your nail art game!
With blooming flowers, vibrant colors, and sunny days, spring inspires creativity and fun in your nail designs.
Whether you’re a seasoned nail artist or a beginner, these 13 easy DIY tutorials will guide you in creating stunning spring nails right at home.
Get ready to transform your nails into a canvas filled with butterflies, flowers, and pastel hues that capture the essence of the season!
1. Floral Delight
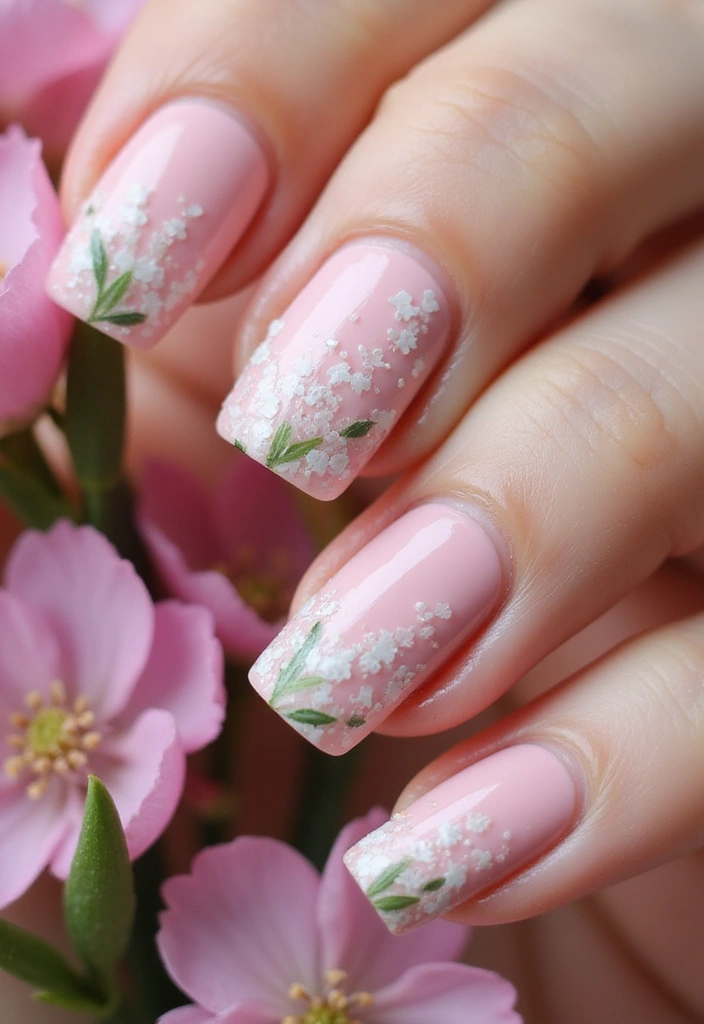
Embrace the beauty of spring with stunning floral nail art!
Begin your nail transformation by applying a light pink nail polish as your base coat. Once the polish dries, unleash your creativity using a dotting tool to craft delicate flowers. Simply create small dots in a flower shape with white polish, and for an added touch of detail, use a thin detail brush to paint tiny green leaves.
To ensure your beautiful design lasts, finish it off with a layer of topcoat nail polish for a glossy finish. Remember, the charm of spring lies in its imperfections, so don’t fret if your flowers aren’t flawless! Feel free to experiment with vibrant colors like lavender, mint, or soft yellow, and try different flower shapes such as daisies or tulips to create a truly unique look.
2. Rainbow Pastels
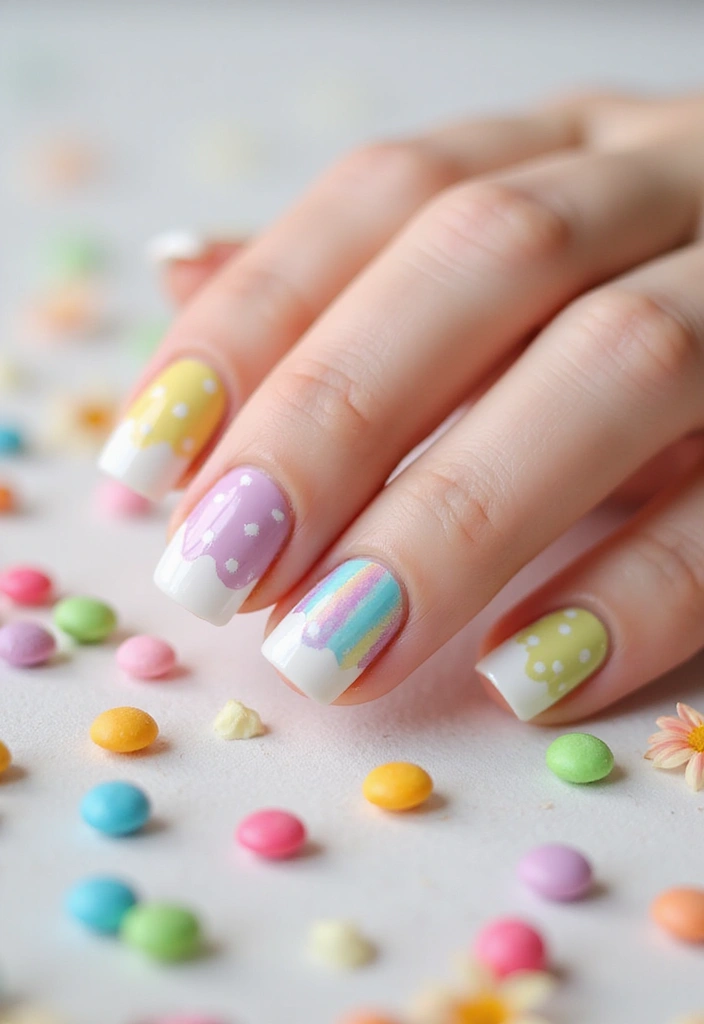
Nothing embodies the spirit of spring quite like a delightful rainbow of colors!
To create this vibrant nail design, opt for a pastel nail polish set featuring shades like baby blue, lavender, and soft yellow. Paint each nail a different pastel hue for a playful and cheerful look. Once your base colors are dry, take a small nail art brush to add swirls or stripes with white polish on each nail. For an extra touch of whimsy, consider dotting tiny accents in contrasting colors!
Don’t forget to protect your nails with a base coat before applying the colors to ensure they pop beautifully. To finish off your design, a matte topcoat will give your nails a chic and trendy appearance.
This whimsical rainbow pastel design is perfect for anyone looking to add a touch of joy to their fingertips!
Here are some products to help you achieve this look: a pastel nail polish set, a small nail art brush, a matte topcoat, and a base coat. Happy nail painting!
3. Butterfly Kisses
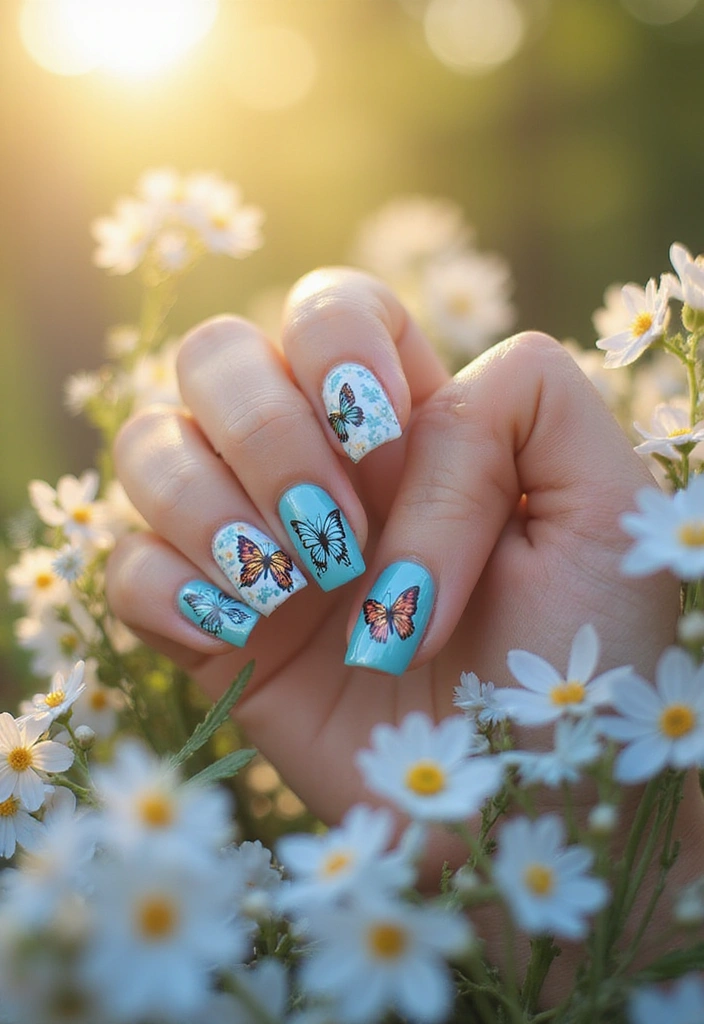
Embrace the beauty of spring with enchanting butterfly designs on your nails!
Begin your nail art journey by applying a light blue nail polish as your base coat, reminiscent of a clear sky. Once the base is dry, take a fine detail brush, like this fine detail brush, to paint delicate butterflies in vibrant shades such as orange, yellow, and purple.
For the butterfly wings, create two rounded shapes on each nail and embellish them with tiny dots for an intricate touch. Don’t forget to add antennae using the same fine brush for that perfect finishing touch.
If you find painting challenging, you can opt for butterfly nail art stickers for a quick and easy alternative. To ensure your beautiful designs stay intact and shine brilliantly, apply a topcoat as the final step. With this whimsical design, your nails will undoubtedly make a stunning statement this spring!
4. Geometric Garden
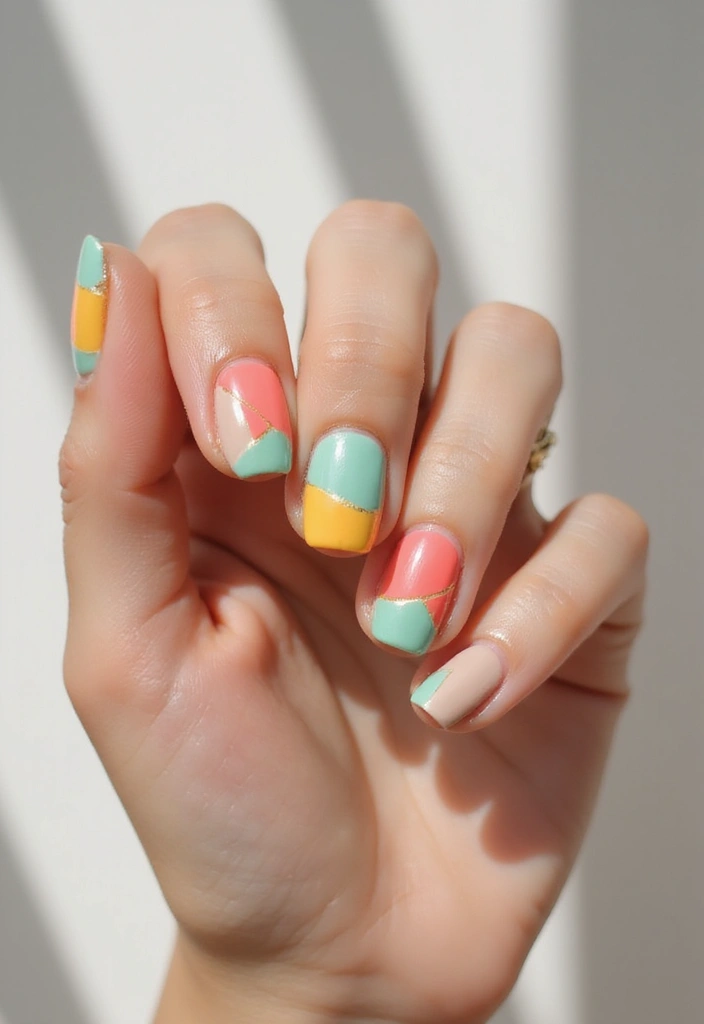
For those who appreciate the elegance of modern art, geometric nail designs are a fantastic choice for spring! Start with a nude base coat to create a neutral canvas that allows the vibrant geometric shapes to truly stand out.
Utilize nail art tape to achieve sharp, clean lines as you paint various sections with bright, cheerful colors such as coral, mint, and yellow from your collection of bright color nail polishes.
After the polish has dried, gently peel away the tape to unveil your stunning design, characterized by its crisp lines and fresh look—perfect for any spring outing.
For an added touch of uniqueness, consider applying a matte topcoat to give your nails a chic finish. Don’t hesitate to mix up the shapes—triangles, squares, and stripes can all contribute to a fabulous and stylish design that is both simple and eye-catching!
5. Sweet Stripes
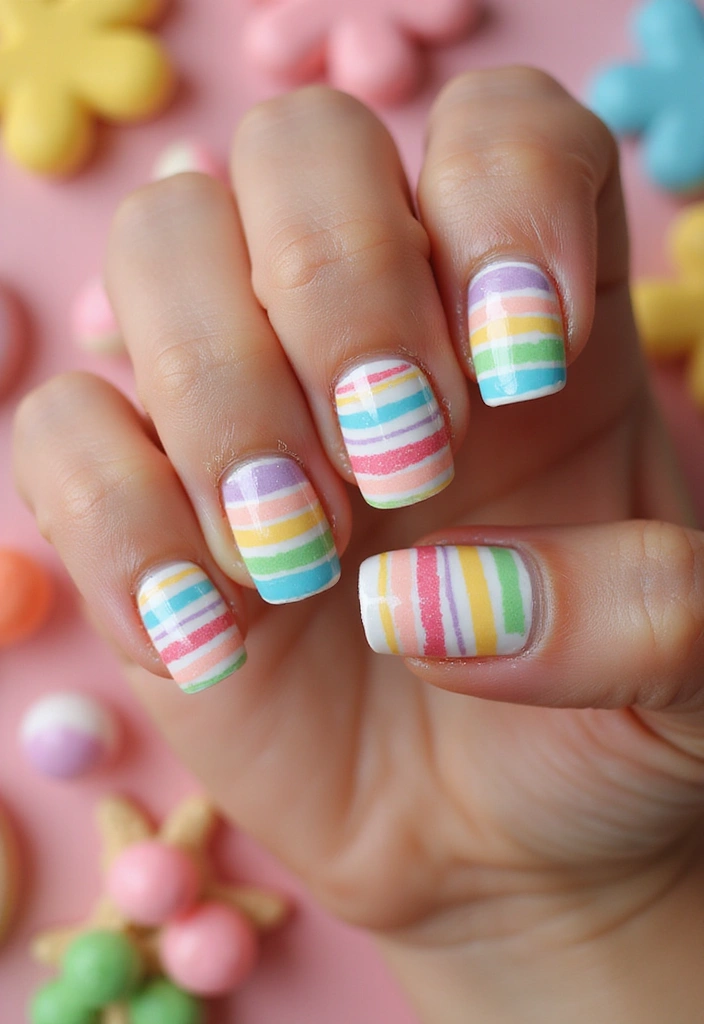
Stripes are a timeless nail art design that effortlessly combines simplicity with elegance!
To create your own stunning striped nails, start by selecting two or three vibrant spring colors and applying a base coat of your first choice. Once it’s completely dry, use striping tape to outline your desired patterns, and fill in the spaces with your chosen shades, whether you prefer soft pastels or bold hues.
This technique opens up a world of creative possibilities, allowing you to express your style beautifully. Don’t forget to finish with a glossy topcoat for a polished look; you can find a great option here.
To ensure clean lines, keep a steady hand while applying the tape and paint. Additionally, having a nail art brush on hand can help with precision. Striped nails are incredibly versatile and perfect for any occasion!
6. Dotted Dreams
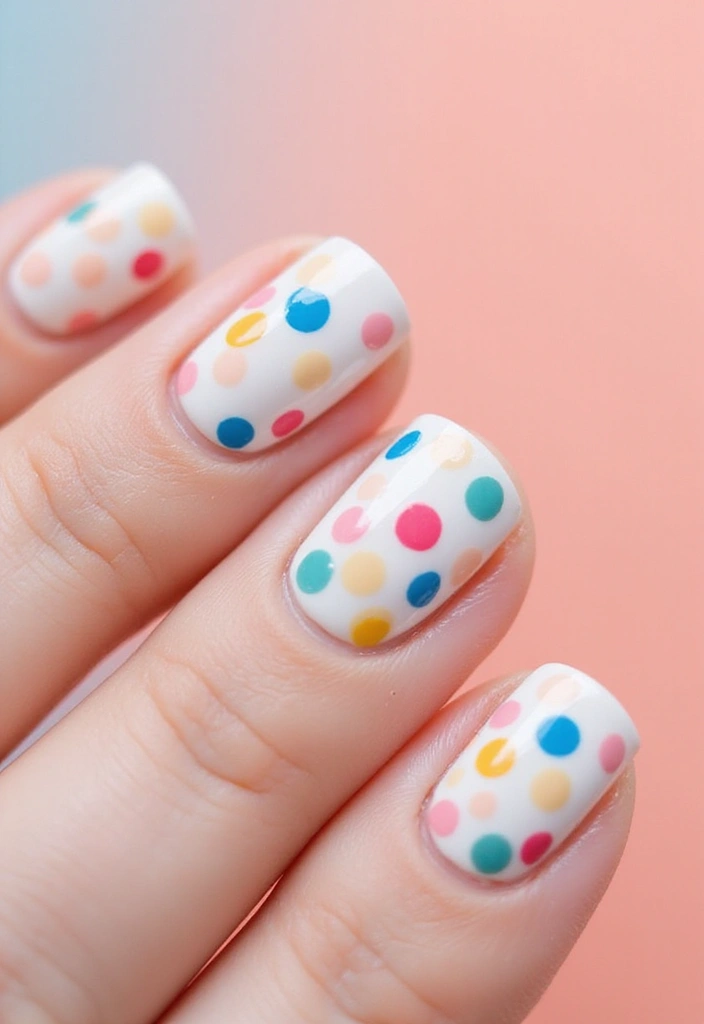
Dotted nail art is an enjoyable and accessible technique that anyone can quickly master! Start off by applying a beautiful pastel base coat using pastel nail polishes for a fresh spring vibe.
Once your base is dry, grab a dotting tool to create polka dots in various colors. You can choose to make them large or small, and even experiment with different patterns!
Consider arranging your dots in a spiral or in clusters for a more artistic flair. To finish off your masterpiece, apply a glossy topcoat to seal your design and add a brilliant shine.
Remember, don’t hesitate to mix and match colors and sizes for a fun and playful effect. This design is perfect for beginners, allowing you to express your creativity without the stress of achieving perfection! For additional guidance, a nail art guide can help you explore even more exciting designs!
7. Ombre Elegance
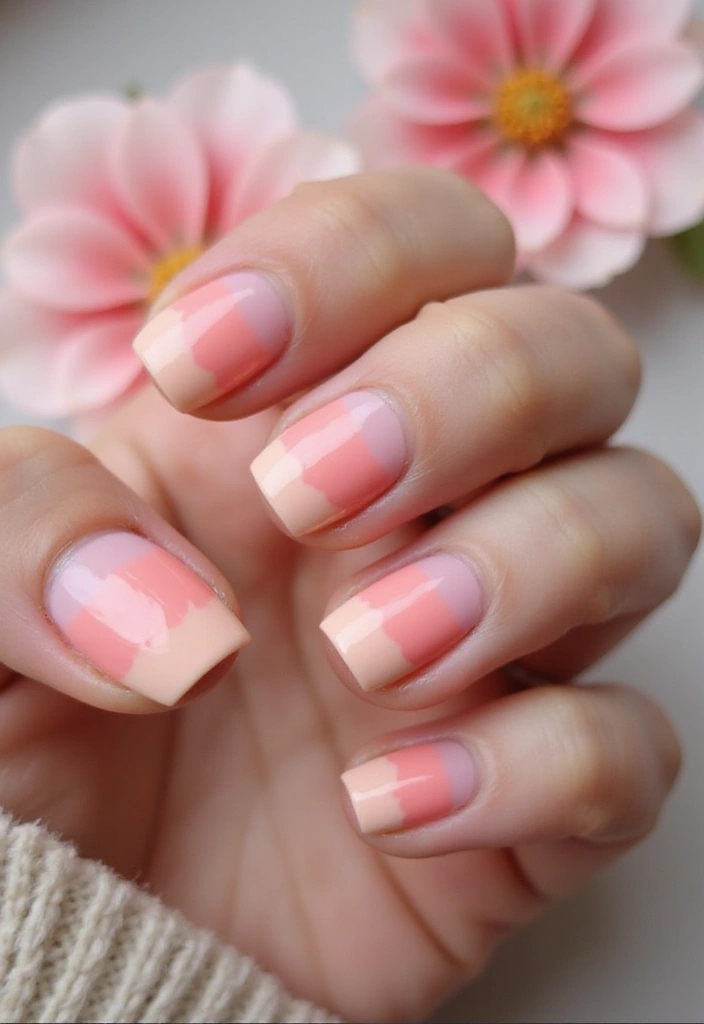
Ombre nails offer a stunning way to create a seamless blend of colors that is perfect for the spring season!
To get started, select two or three complementary shades, such as pink, peach, and white. Begin by applying a solid base coat using a high-quality base coat to ensure a smooth foundation for your design.
Next, take a makeup sponge and gently dab the darker color onto the tips of your nails, gradually blending it down towards the base. This technique will give you a breathtaking gradient effect that radiates elegance and is easily customizable to match your personal style.
For a polished finish, don’t forget to apply a layer of topcoat nail polish to add shine and smooth out any texture left by the sponge. With just a few simple steps, you’ll achieve beautiful ombre nails that are sure to impress!
8. Sparkling Sprouts
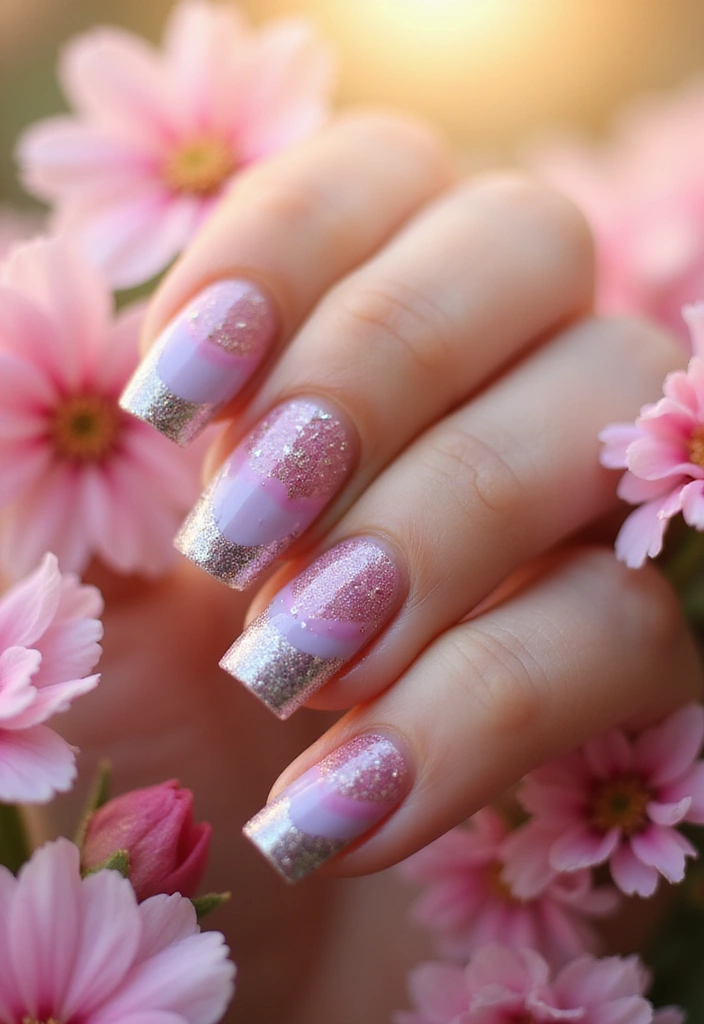
Add a dazzling touch to your spring nails with some eye-catching glitter designs!
Begin by applying a beautiful pastel base coat, which you can find in a variety of shades from pastel nail polishes. Next, elevate your manicure by using glitter polish on the tips of your nails to create a stunning gradient effect. For even more creativity, you can use glitter to design patterns or add accents that truly stand out.
Combining fine and chunky glitter will give your nails a unique and playful look, perfect for any celebration or simply to brighten up your everyday style!
To ensure your glitter adheres well, start with a sticky base coat, and finish off your masterpiece with a topcoat polish to keep your design intact. Glitter nails are not only fun but also incredibly eye-catching!
9. Nature’s Palette
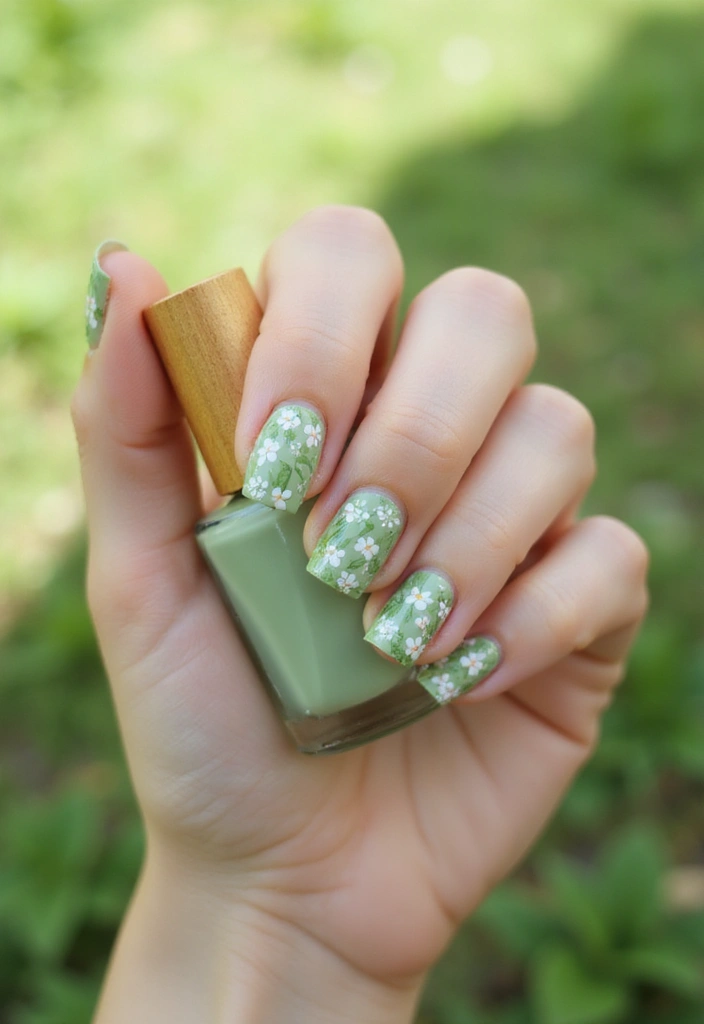
Transform your nails into a canvas of nature with enchanting, nature-inspired designs! Start with a beautiful light green base using light green nail polish. With a fine brush from this fine brush set, delicately paint tiny leaves and branches to create a charming botanical look.
For an extra whimsical touch, consider adding small flowers or playful ladybugs using flower nail art stickers. This design not only celebrates the beauty of spring but also infuses your nails with a refreshing, lively element.
To personalize your art even further, finish with either a matte or glossy look by applying a matte or glossy topcoat. Explore different shades of green for your leaves and play with vibrant colors for the flowers to truly make your nail art pop!
10. Candy Coated
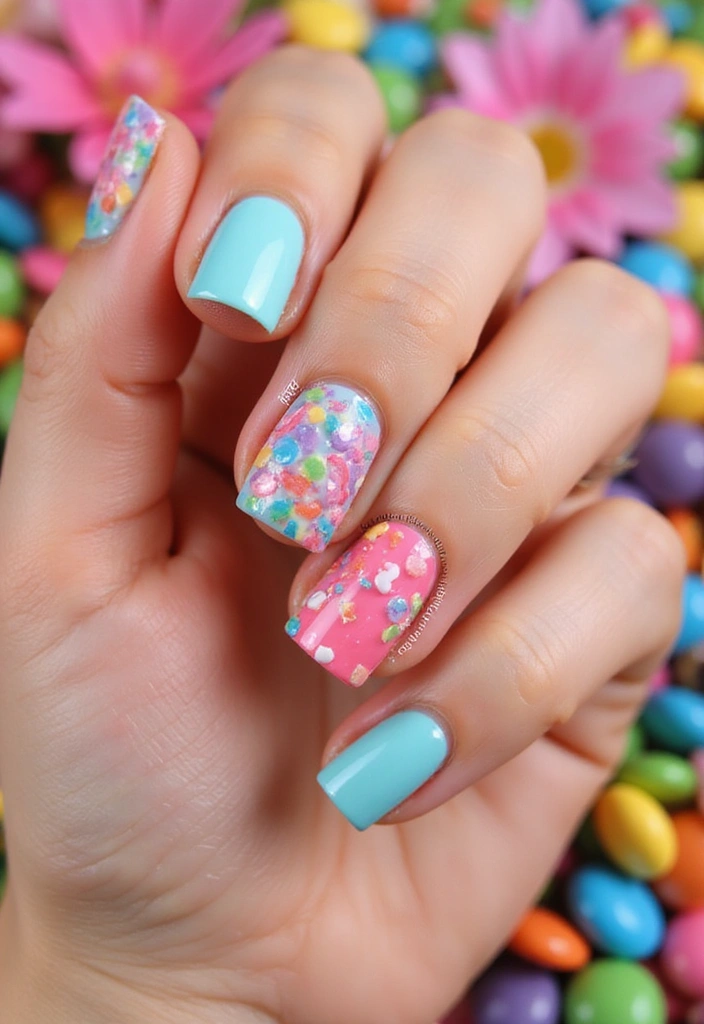
Sweeten up your nails with a delightful candy-inspired color palette this spring!
Opt for bright and cheerful shades like bubblegum pink, mint green, and lemon yellow. You can achieve this vibrant look by using a candy-colored nail polish set that features all the shades you need.
Paint each nail in a different color and get creative with fun designs, such as sprinkles or candy stripes, using fine nail art brushes for precision.
To ensure your colorful masterpiece shines and stays protected, finish off with a glossy or matte topcoat—the choice is yours!
For an extra touch of fun, consider adding nail art stickers to enhance your candy-coated nails. This playful design is sure to bring smiles to everyone who sees it!
11. Minimalist Chic
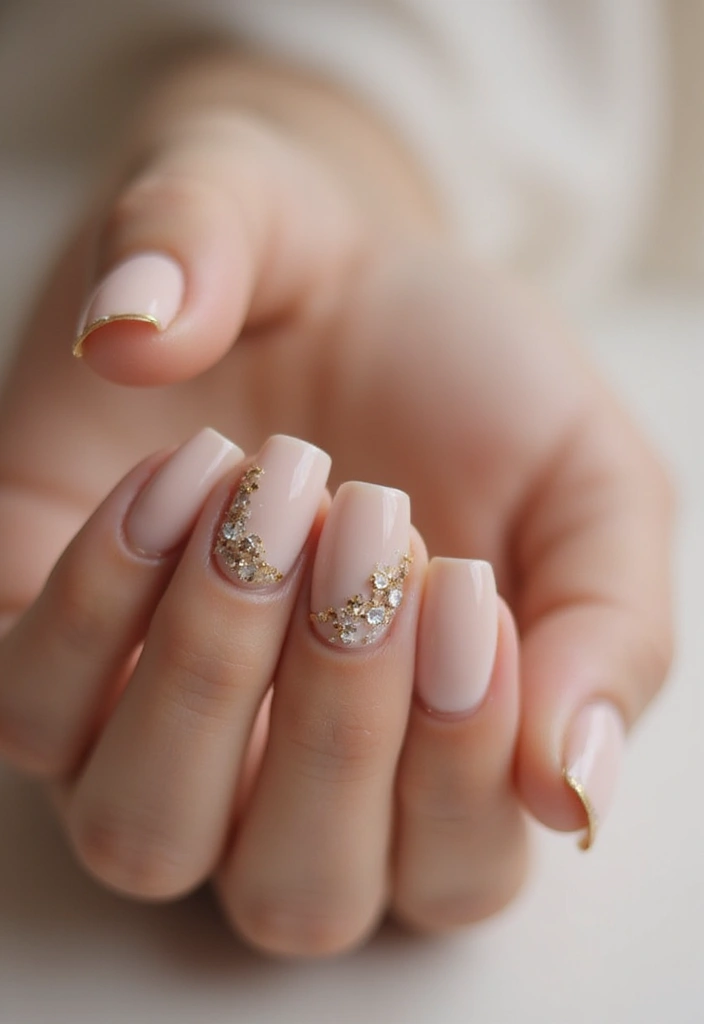
For a sleek and sophisticated look, embrace the beauty of minimalist nail art!
Begin by applying a smooth layer of neutral nail polish as your base coat. This serves as the perfect canvas for simple yet striking designs, such as a single line or dot in a contrasting color.
To elevate your style, consider adding touches of gold or silver for a hint of elegance. Minimalist designs allow your nails to appear polished and chic without the fuss, making them ideal for any occasion.
Remember, maintaining well-shaped and healthy nails is key for this design to truly shine. Finally, seal your artwork with a glossy finish using a glossy topcoat, which enhances the minimalist aesthetic beautifully. With this approach, you’ll find that less really is more!
Don’t forget to invest in some nail art tools to help create those precise designs effortlessly.
12. Tropical Vibes
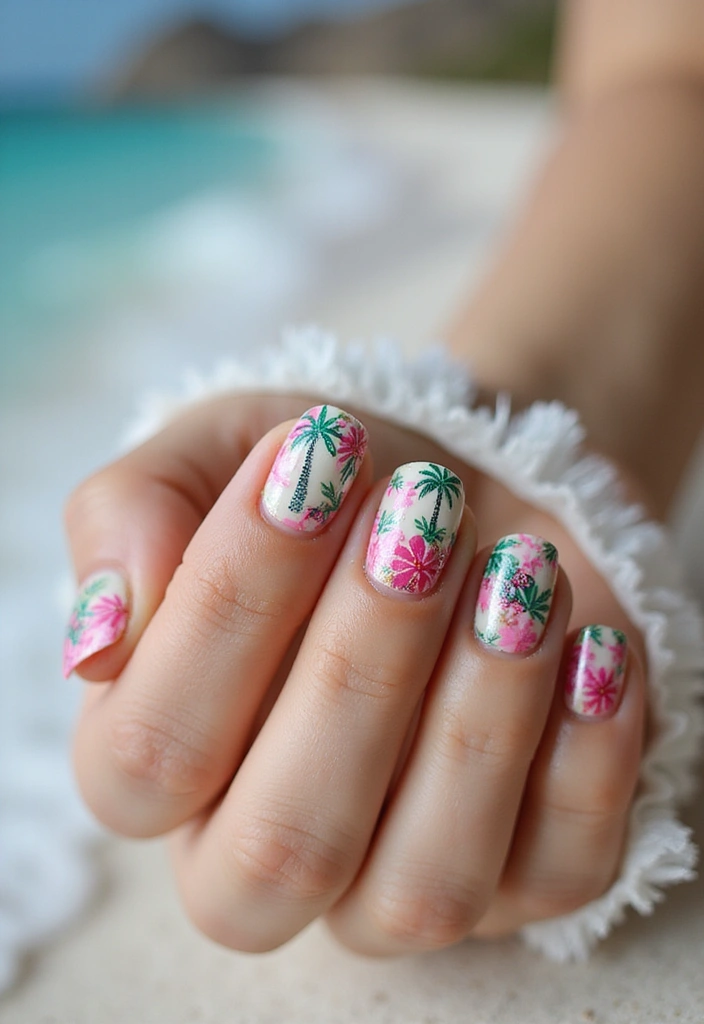
Bring a splash of tropical flair to your nails with vibrant designs that are sure to catch attention!
Begin with a bright base coat in shades like coral or teal—check out this bright coral and teal nail polish for the perfect hues. Using a fine detail brush, you can create stunning palm trees or beautiful tropical flowers that embody the essence of a warm getaway. If you’re pressed for time, consider using tropical nail art stickers for a quick yet fabulous look.
To achieve a glossy finish, don’t forget to apply a topcoat polish that will make your nails shine bright!
Remember to mix and match different colors to create a unique and eye-catching tropical scene. These nails are perfect for spring break or any summer-themed gatherings, bringing that vacation vibe right to your fingertips!
13. Whimsical Watercolor
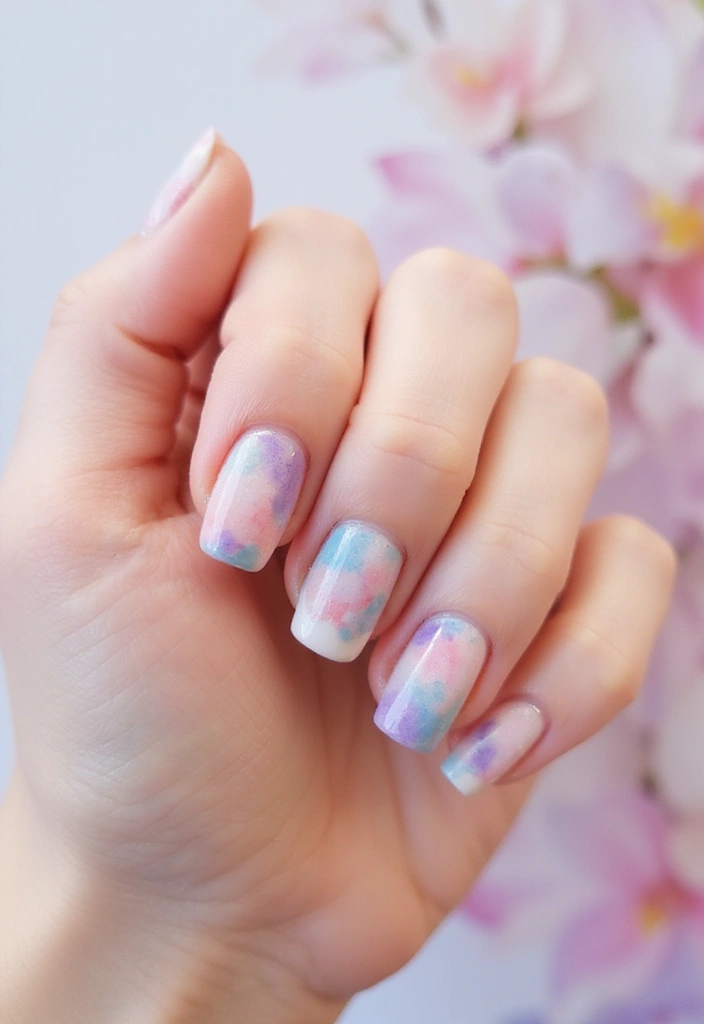
Try your hand at creating whimsical watercolor nail art for a stunning, dreamy effect!
Begin with a white base coat to ensure your colors truly pop—check out this base coat for a perfect foundation.
Choose a watercolor nail polish set, like this one watercolor nail polish set, and use a makeup sponge, such as this makeup sponge, to dab the colors onto your nails, creating that beautiful watercolor look.
You can opt for soft blends for a subtle vibe or go for bold splashes to express your unique style. Don’t forget to finish with a topcoat, like this topcoat nail polish, to seal in your artistic design.
Remember, practice makes perfect! Feel free to experiment with different color combinations to make your watercolor nails truly artistic and full of personality—perfect for spring!
Conclusion
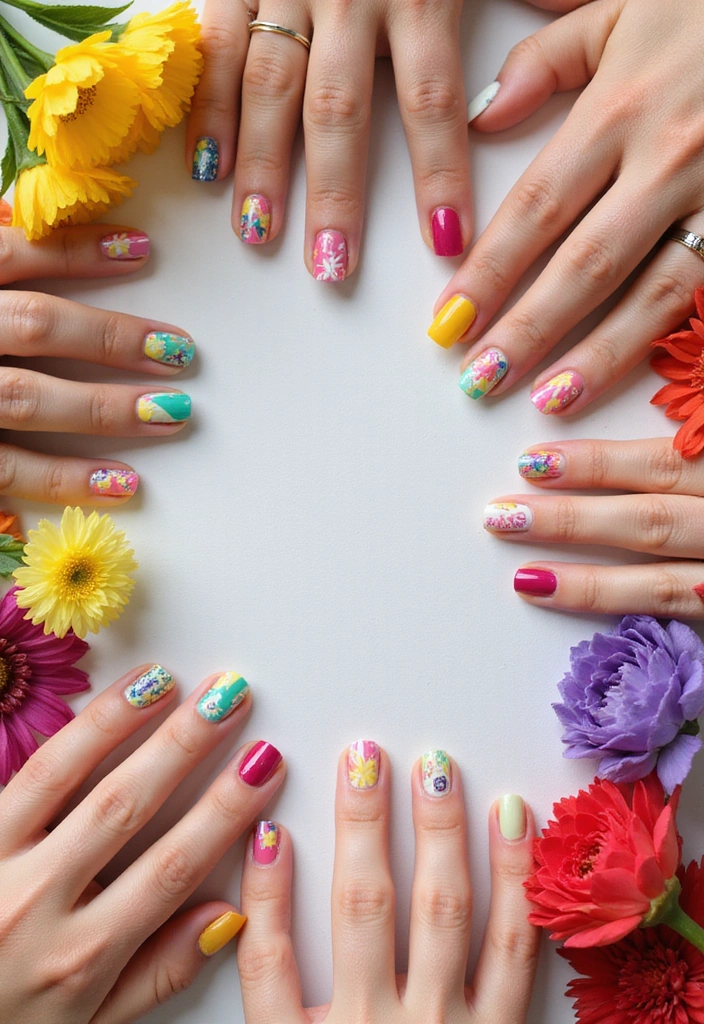
Spring is the perfect time to express yourself through nail art!
With these 13 easy DIY spring nail art tutorials, you’ll be ready to create stunning designs in minutes. From floral patterns to playful dots, there’s something for everyone.
So grab your nail polish and let your creativity flow this spring!
Note: We aim to provide accurate product links, but some may occasionally expire or become unavailable. If this happens, please search directly on Amazon for the product or a suitable alternative.
This post contains Amazon affiliate links, meaning I may earn a small commission if you purchase through my links, at no extra cost to you.
25 Online Photography Sales Platforms That’ll Make You Rich (You Won’t Believe #16!)